16 DIY Decor Ideas for Kids’ Game Spaces
Explore the world of creativity with these 16 DIY decor ideas for kids' game spaces, turning simple rooms into imaginative havens. Start with a chalkboard wall for artistic expression or themed wall decals to bring stories to life.
Transform clutter into organized charm using unique storage solutions or create a magical playhouse under the stairs. Each idea offers a unique way to inspire and engage young minds.
Chalkboard Wall Fun
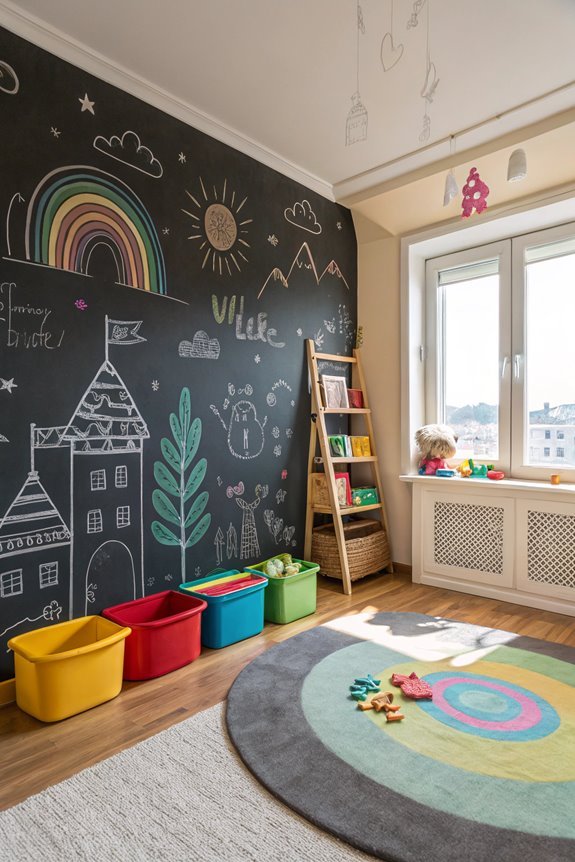
Add a playful and functional element to your kids' game space with a chalkboard wall. Use chalkboard paint in fun colors like green, navy blue, or white to transform any wall. A chalkboard wall provides a creative outlet for children, encouraging them to explore their artistic abilities. Mark the area with painters tape for clean edges and apply the paint using a small sponge roller, layering coats for durability. Remove the tape while the paint is wet for crisp lines. Customize with frames or borders using 1×2 pine boards. For added creativity, incorporate magnetic paint. Regular cleaning keeps the surface ready for drawing and writing, offering a versatile space for creativity and organization, perfect for your little ones' imagination.
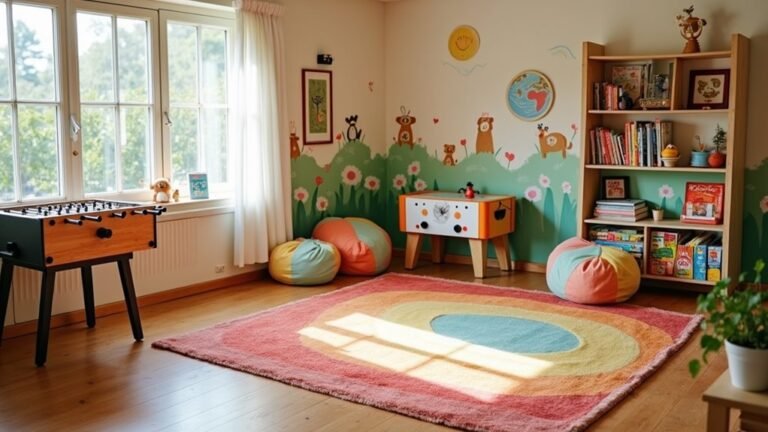
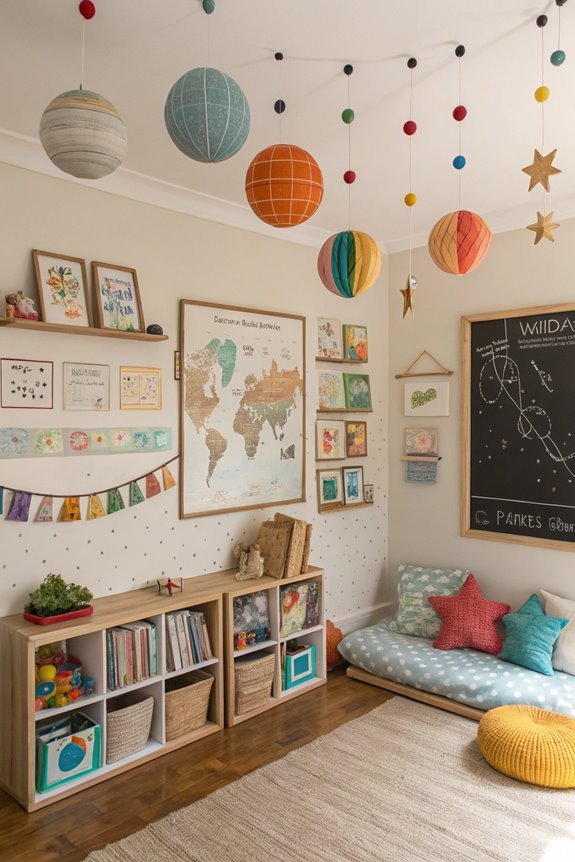
Themed Wall Decals
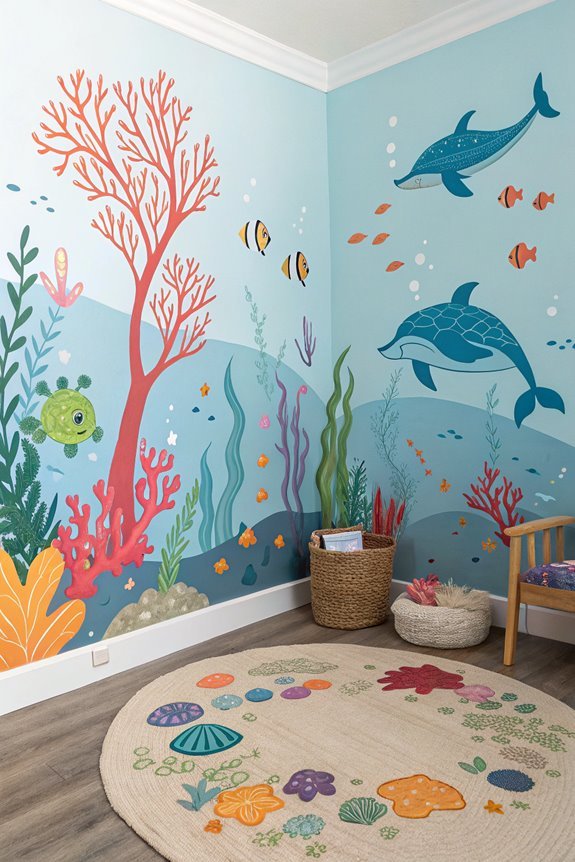
Enhance your kids' play area with themed wall decals that spark creativity and fun.
Whether they dream of exploring space or embarking on adventures, there's a perfect set for them. Opt for space themes with stars, planets, and astronauts, including glow-in-the-dark options for a magical night. A great choice for creating a dynamic space bedroom environment is the Space Adventures Mural, which features large removable wall decals that are easy to apply and reposition.
For adventurous kids, create zones with maps, mountains, and animals, or dive into a safari or under-the-sea theme with jungle animals or mermaids.
These decals are easy to apply and remove, allowing for easy theme changes as interests shift. Educational decals like alphabet letters or world maps add a learning element, making playtime both enjoyable and enriching.
Creative Wall Murals
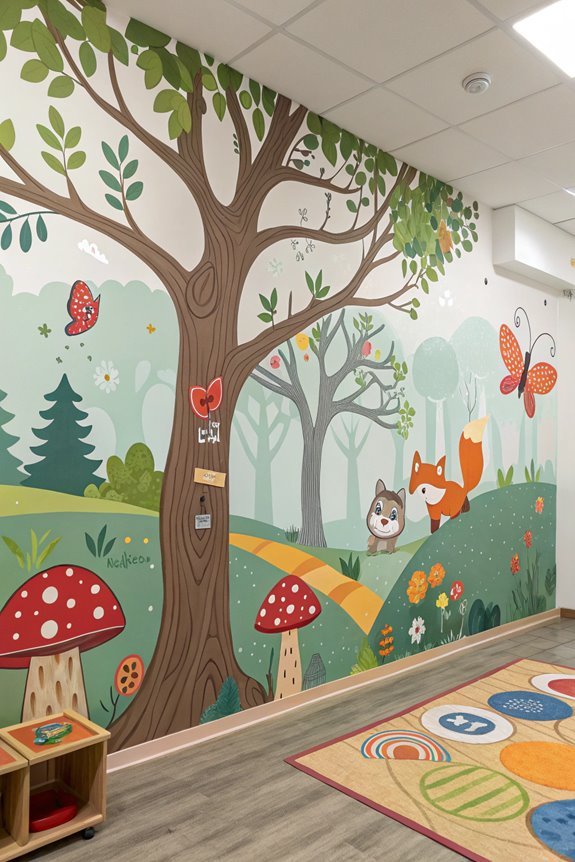
Bring your child's playroom to life with creative wall murals. Involve your child in the design process to ensure it reflects their interests. Use tools like Procreate for sketching and scaling, and consult Pinterest for inspiration.
Keep the mural simple and colorful, matching the room's theme. Project the design onto the wall, prime the surface for better adhesion, and use quality materials like Benjamin Moore paint and clear matte polyurethane for durability. Consider adding climbing holds to the mural as they can be sourced affordably on Amazon.
Incorporate art materials like chalk pastels and liquid watercolors for texture and depth. Add features like climbing holds to create a versatile play space.
Kids' Art Display
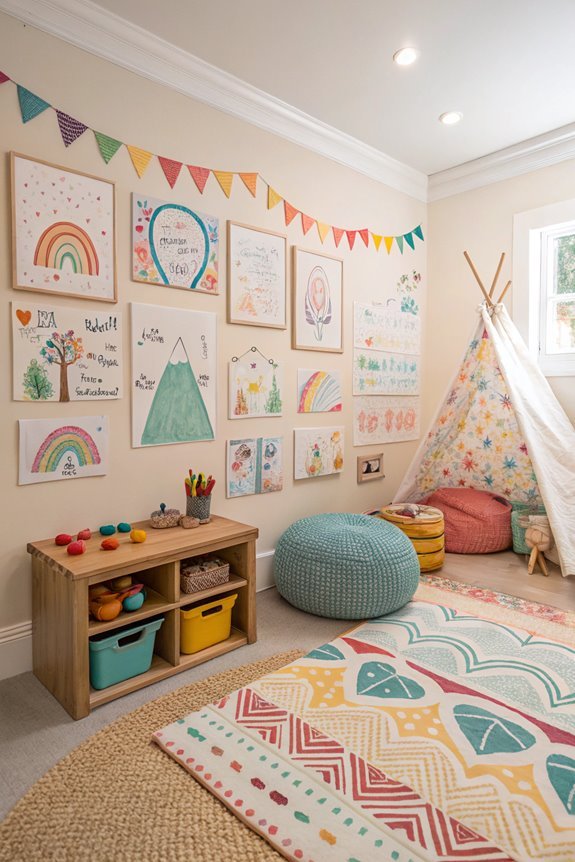
Transform your child's playroom with vibrant wall murals and showcase their creativity with a personalized art display.
Use furring strips or wooden planks with metal clips, staining the wood for polish, or try colorful clothespins and wooden rulers decorated with markers. A corkboard with magnetic strips allows easy art swapping.
For a rotating gallery, hang wire or string for kids to manage their own displays. For something unique, try a wood bead and clip garland.
IKEA's wire curtain rods are ideal for hanging artwork. Use matching frames for an organized gallery wall.
Educational Art Pieces
Explore educational art projects to boost your child's creativity and learning.
Begin with space-themed activities like painting a galaxy or crafting a rocket with construction paper and foil, teaching skills such as cutting and assembling.
Create a space diorama in a shoebox with glow-in-the-dark stars for added magic. Use geometric shapes to enhance spatial understanding.
Organize art supplies with labels to foster independence, and select age-appropriate materials to ensure a fun, frustration-free experience.
Toy Cubbies Organization
Create an organized game space with DIY toy cubbies using 2 x 2 and 1 x 2 lumber for the frame, 1 x 8 for shelves, and 1/4" MDF for cubby walls.
Secure the frame with braces and even corners, then install evenly spaced shelves with 45-degree cut supports.
Assemble cubby walls and ends with MDF, wood glue, and finish nails.
Add trim and bead board for a polished finish.
Use clear plastic bins that fit the shelves, and organize toys by category for a clutter-free playtime.
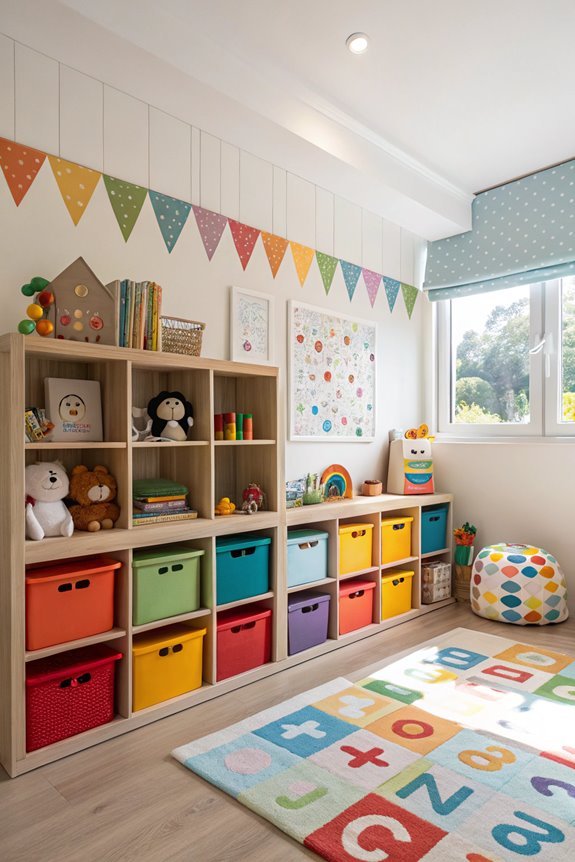
Cute Storage Solutions
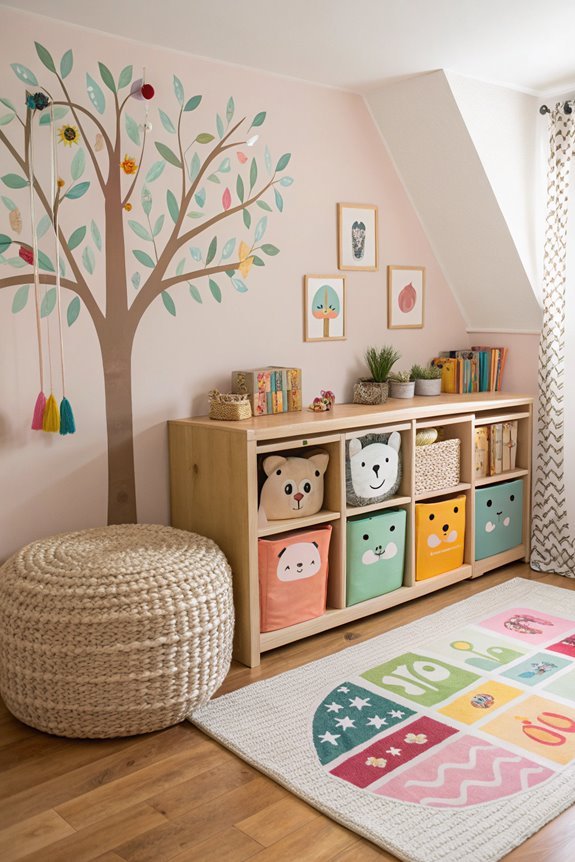
Transform your kids' play area into an organized and fun space with clever storage solutions. Use versatile cubby units painted to match your decor, and add cute baskets for hidden storage.
Place clear canisters on top for art supplies. Wicker baskets or patterned totes add style while organizing toys. Playroom cabinets are ideal for board games and crafts, and wall-mounted cabinets save floor space.
Built-in bookcases with storage baskets keep toys tidy, and wrap-around built-ins optimize wall space with open and closed shelves. Opt for decorative storage like covered floor baskets or upholstered ottomans with hidden storage.
Label baskets and bins with chalkboard tape for easy access.
Floating Shelves Display
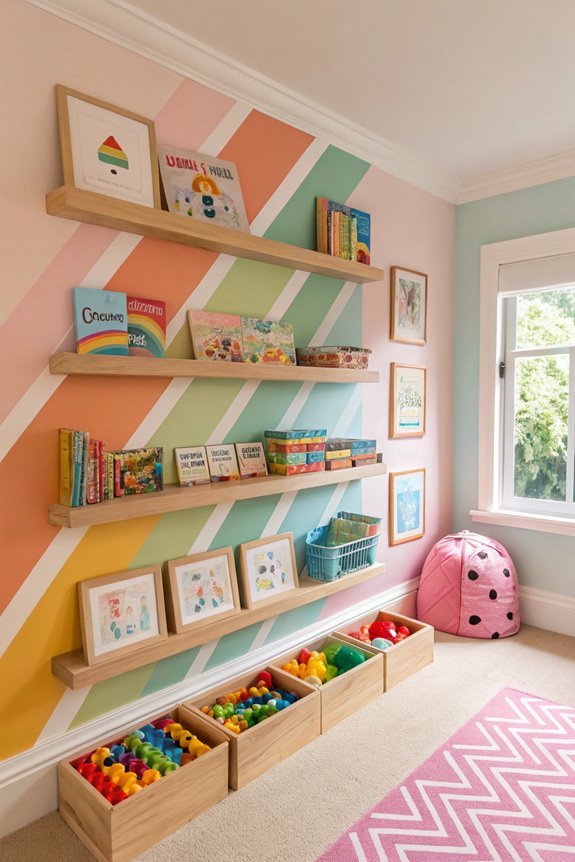
Enhance your kids' game space with stylish floating shelves. Measure the area, considering width, depth, and spacing.
Use 2×3 or 2×4 lumber for the base and half-inch plywood for the shelves. Replace brackets with dowel rods for a sleek look.
Cut materials to size, attach the framing lumber to wall studs with screws, and ensure it's level. Secure the plywood with wood glue and nails, fill nail holes with wood filler, and paint or stain to match the room.
With a saw, drill, and level, create a chic display for toys and games.
Pegboard Toy Organizer
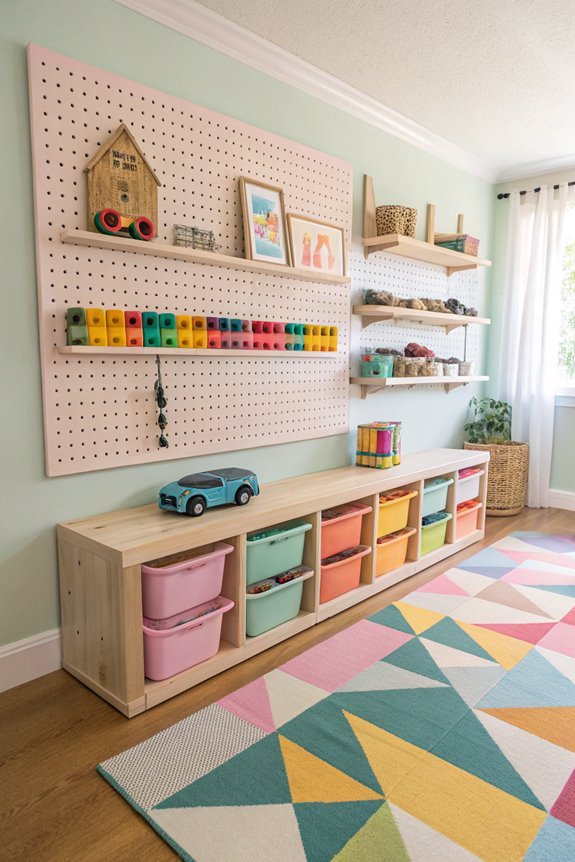
After creating a stylish display with floating shelves, add a pegboard toy organizer for functionality in your kids' game space.
Choose a pegboard size and hole pattern—¼ or ⅛ inch—and cut it with a miter or handsaw. Build a frame with 1 x 2 wood boards for stability and attach the pegboard with flat head nails.
Install spacers to keep it off the wall for hooks. Paint it to match the room's color scheme. Use hooks, baskets, and shelves to organize toys efficiently.
Ensure it's securely fastened with screws and washers for safety. This setup offers flexibility and easy access to toys.
Hanging Storage Pockets
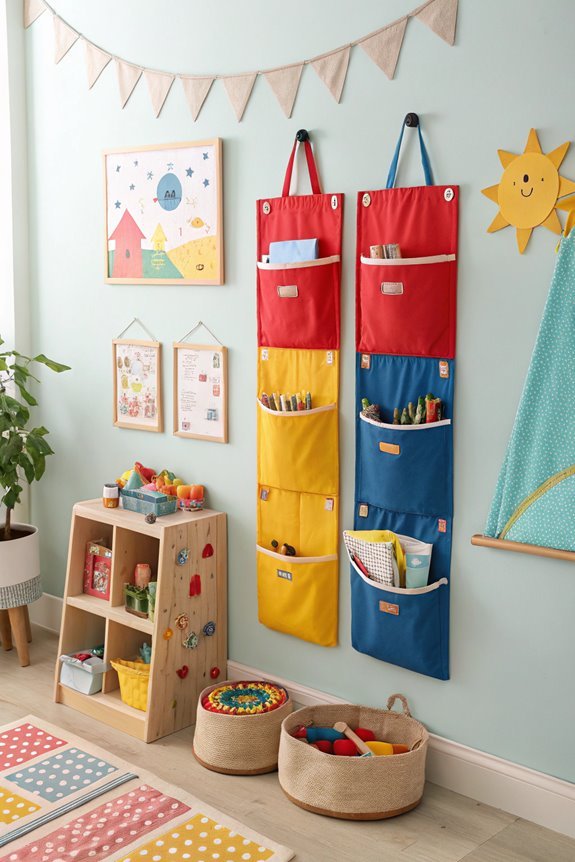
Hanging storage pockets are an excellent way to organize your kids' game area. Choose a durable fabric or canvas for the base and various-sized cloth pieces for pockets.
Use a sewing machine, scissors, and pins to assemble, ensuring pockets fit different items. Attach hanging loops or a dowel rod for easy display.
Customize the layout and consider iron-on labels for organization. Hang it in any room to store game controllers, small toys, or art supplies.
Experiment with materials and designs to personalize your kids' play space.
DIY Mini Stage
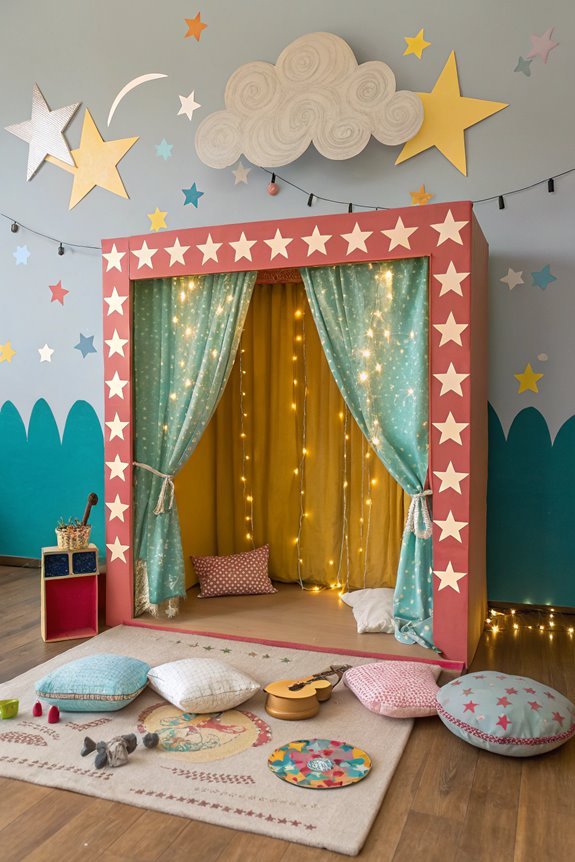
Building a DIY mini stage can enhance your child's imaginative play.
Choose 2x6s for a taller stage or 2x4s for a lower one. Assemble the frame with exterior screws and cover it using 1"x10" boards. Add 2-foot legs for elevation.
Paint the stage and decorate with wooden stars and gold glitter. Install curtains with tension rods for a backstage area.
Ensure the stage front is flush to prevent tripping. Add carpet for noise reduction, creating an ideal play space.
Indoor Swing Setup
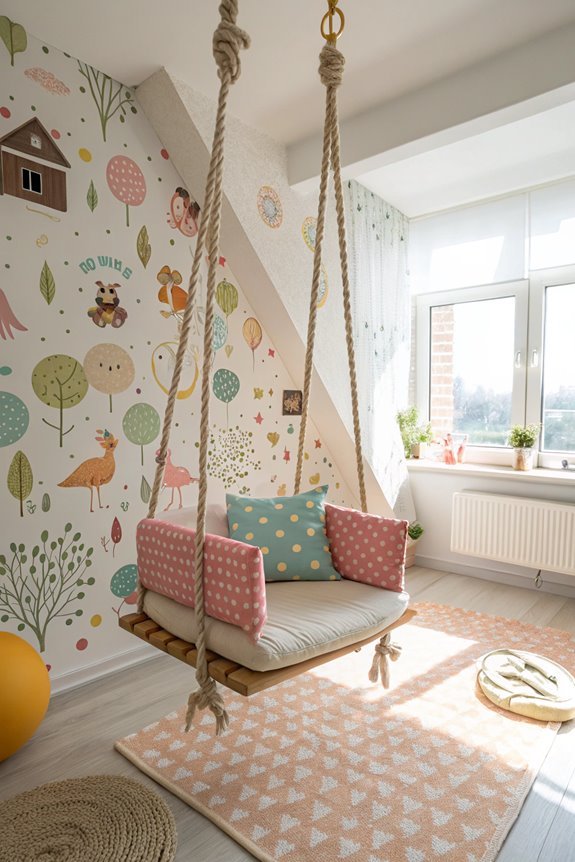
Transform a home corner into a playful oasis with an indoor swing to delight your child.
Start by selecting a sturdy wood board for the seat, cutting it to size, and sanding the edges smooth. Drill holes for the rope and seal the wood with polyurethane or Polycrylic for durability.
Use a stud finder to locate ceiling joists, mark spots for the eye hooks, drill pilot holes, and screw in the hooks. Attach quick link chain connectors if needed.
Thread the rope through the hooks and seat holes, tying secure knots underneath. Adjust the swing's height, trim excess rope, and ensure it's level.
Enjoy this engaging addition!
DIY Ball Pit
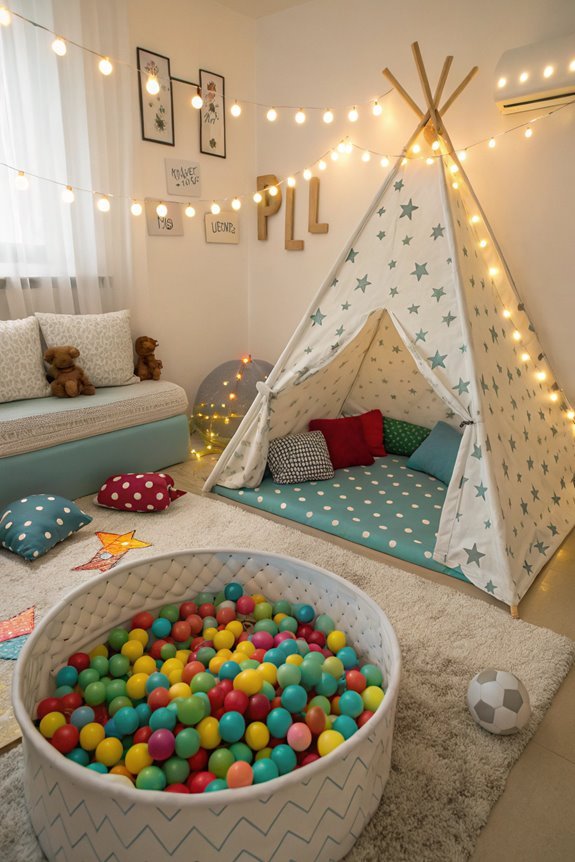
A DIY ball pit can spark a child's imagination. Build a sturdy frame with PVC pipes and connectors, secured with PVC cement, and use zip-tied utility netting for the enclosure.
For safety, line the top with foam pool noodles and add foam padding to the walls, ensuring the floor is covered.
Calculate the number of polystyrene balls needed; for instance, a 3 ft x 2 ft x 1.5 ft pit requires 400-450 balls.
Secure the pit to a wall with a stud finder and pocket hole screws. This project turns any space into a colorful adventure.
Dress-Up Corner
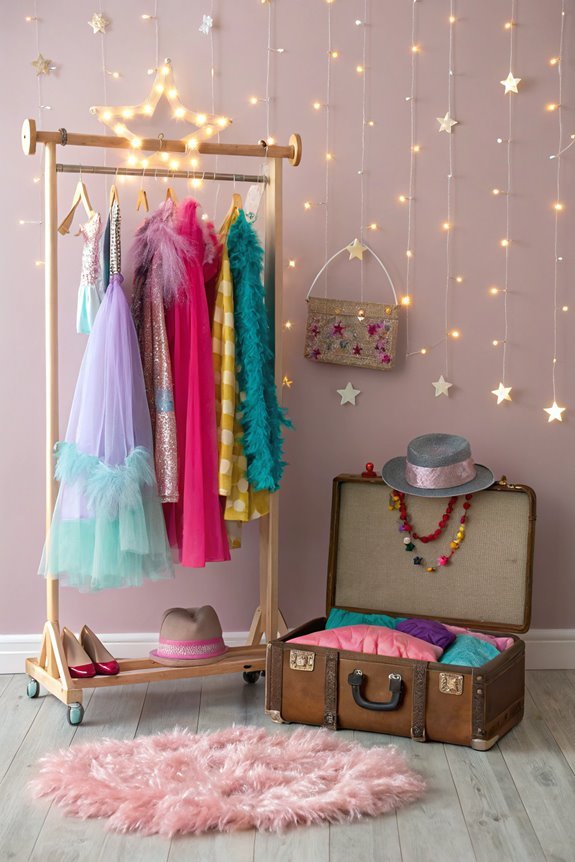
Transform a simple corner into a magical dress-up space for your child with creativity.
Use Command™ Damage-Free Hanging Strips to mount hooks at a child-friendly height for easy costume access. A birch plywood piece, supported by wood dowels and furniture feet, serves as a dress-up center.
Include a full-length mirror for essential viewing. Install small shelves with plastic baskets for hats and masks, and use wicker baskets or patterned totes for smaller items.
Metal racks organize costumes. Enhance the space with themed elements, color coordination, decorative shelves or wardrobes, and curtains or drapery to spark imagination.
Cozy Fort Ideas
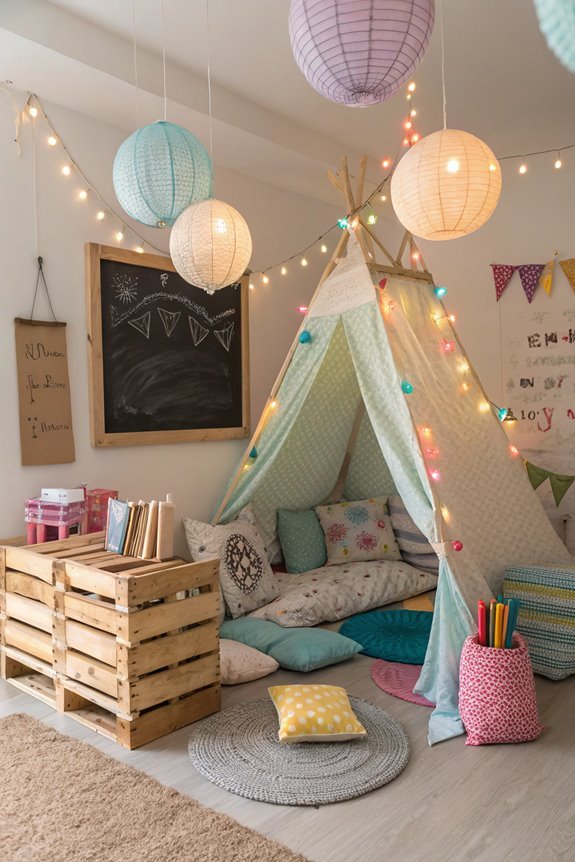
Designing a cozy fort for kids blends creativity and simplicity. Use everyday items like chairs, tables, or doors as the structure and drape sheets or blankets over them.
Add pillows and cushions for comfort. Enhance the ambiance with twinkle or fairy lights. Ensure the fort is stable and safe.
For pillow forts, stack small pillows and cover with a large comforter, using sofas or chairs for support.
For a teepee, tie three or four sticks and drape a blanket around them.
Playhouse Under Stairs

Transform the space under the stairs into a magical kids' playhouse by first measuring and planning the layout.
Consider height and headroom, and decide on door and window placement for ventilation and access.
Use treated 2x4s for moisture protection and frame with a 16″ pattern for stability, securing it to the staircase and floor.
Finish the interior with drywall, paint, or wallpaper, and add child-friendly lighting.
Trim the exterior with pine, cedar shiplap siding, and asphalt shingles for the roof.
Include a porch light, Dutch door, and decorative elements like flower boxes.
With thoughtful design, this hidden nook becomes an enchanting play space.
Conclusion
Dive into these DIY decor ideas to transform your kids' game space into a vibrant wonderland. From chalkboard walls to cozy forts, each project allows for unique personalization, creating a fun, engaging environment. Embrace the playful spirit and explore these projects together, sparking joy and imagination while making lasting memories.